Watermarks are a simple but effective way to protect document security. They clearly show who a document belongs to and help reduce the risk of information leaks. For individual users, Microsoft Word’s built-in word watermark feature is usually enough. But for companies that deal with hundreds or even thousands of contracts, reports, and technical files, adding watermarks to Word in bulk and in a consistent format can be challenging.
This article explains everything, from personal-level operations to full enterprise solutions, covering how to add watermark in Word and offering practical recommendations.
1. How to Add Watermarks in Word (For Personal Users)
When you want to add watermark to a single or a few Word documents, Microsoft’s built-in watermark feature is quick and easy to use. No additional tools are required. You can choose from preset watermarks or create your own custom watermark.
Word usually provides a set of ready-made watermarks such as “Confidential,” “Draft,” and “Do Not Copy.” These are useful for quick labeling. Follow these steps:
- Open the Word document where you want to add watermark to Word and go to the Design tab in the top menu.
- In the Page Background section, click watermark to open the list of preset options.
- Select the watermark you need. It will instantly apply to all pages of the document and show a real-time preview.
- If the color or intensity isn’t suitable, right-click the watermark text to adjust the font and color.

If you need to include personal details, like a name or document ID, a custom word watermark is more appropriate. Word supports both text and image watermarks.
How to Add a Text Watermark to Word
- Go to Design → Watermark and select Custom Watermark at the bottom.
- Check Text watermark and enter your custom text (e.g., “John – 20250601” or “For Personal Study Only”).
- Choose the font (Sans-serif fonts like SimSun or Heiti are easy to read), adjust size and color, and select horizontal or diagonal layout.
- Set the transparency to 50%–70% so it doesn’t obscure the main content, then click OK to apply.
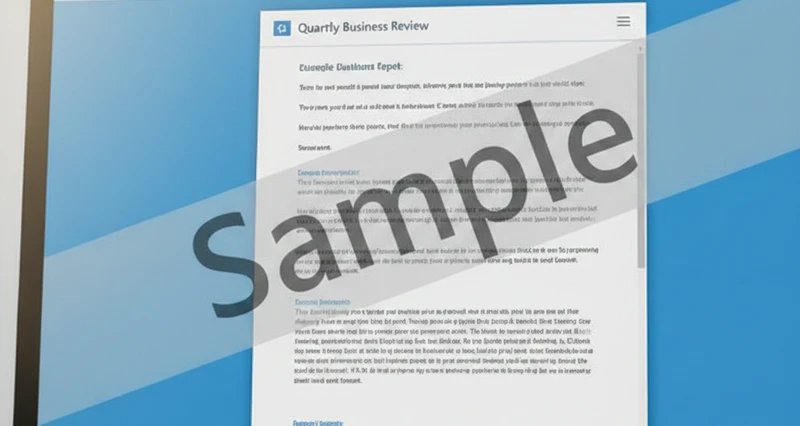
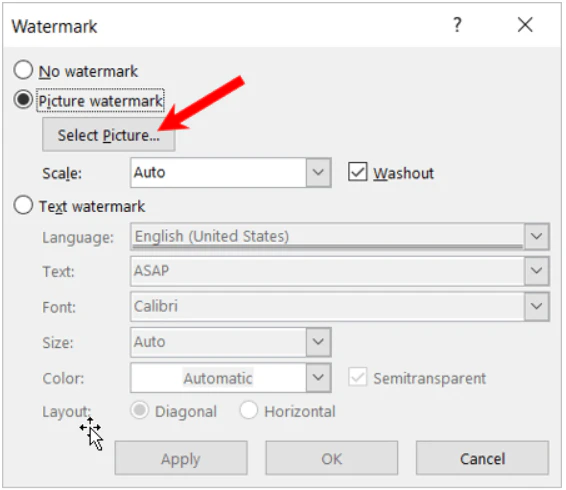
How to Add an Image Watermark to Word Document
- In the putting a watermark in Word settings window, check Picture watermark and click Select Picture.
- Choose an image from your computer (PNG with a transparent background is recommended), then click Insert.
- Enable Washout to lighten the image. Adjust the scale so it doesn’t interfere with the document content. Click OK to finish.
2. How to Add Watermarks in Word (Enterprise-Level Bulk Processing)
Enterprise documents are numerous and diverse, and formatting must be consistent. If employees manually add watermark to Word, the process can be slow, inconsistent, and error-prone. Some sensitive documents may even be forgotten entirely.
Personal methods are no longer sufficient, companies need a professional bulk watermark solution. The best choice is AnySecura, which handles enterprise-wide word watermark management efficiently.
Core Enterprise Requirements for Bulk Watermarking
For companies, watermarks in Word must be more than “just added.” They must be:
- Unified and standardized: Every document needs consistent word watermark, including company name, confidentiality level (“Internal,” “Do Not Share”), employee ID, etc.
- Efficient at scale: Existing documents (e.g., old contracts, technical manuals) and all newly created documents must receive watermarks in Word automatically.
- Permission-based: Different teams/departments require different watermark rules, e.g., Finance uses “Finance Only – Do Not Distribute,” R&D uses “Core Technology – Top Secret.”
- Traceable: Word watermarks must link to user actions so that if data is leaked, responsibility can be traced quickly.
AnySecura: The Best Enterprise Solution for Bulk Watermarks
AnySecura is a professional document security tool designed for enterprise environments. It offers a complete, flexible, and highly automated insert watermark in Word solution with the following advantages:
One-Click Bulk Processing , Over 90% More Efficient
AnySecura lets administrators configure putting a watermark in Word rules centrally, eliminating manual work:
- Full Coverage: All Word files, local or shared, can be watermarked in bulk. Old documents are handled with a single click, and new documents receive watermarks in Word automatically upon creation.
- Supports All Formats: Works not only with Word but also Excel, PowerPoint, PDFs, and other office formats.
- Fast Effect: After setup, changes apply immediately. Thousands of documents can be processed within minutes, saving significant labor.
Flexible Templates for Tailored Enterprise Needs
- Customizable Content: Add dynamic information such as employee ID, timestamp, department, etc., making each document’s word watermark unique and traceable.
- Consistent Style: Font, color, transparency, and placement are fully standardized across all users.
- Automatic Application by Rules: For “Top Secret” documents, apply a bright red watermark automatically; for “Public,” use a lighter one. No employee action needed.
Watermarks Cannot Be Removed , Maximum Security
- Tamper-Proof: Once applied, watermarks in Word merge with the document and cannot be deleted. Screenshots or photos still retain the watermark clearly.
- Complete Operation Logs: Editing, printing, sharing, and watermark operations are all recorded, allowing quick identification of leak sources.
- Multi-Layer Protection: Combined with encryption, permission control, and print watermarks, AnySecura provides end-to-end enterprise document security.
Easy to Use , No Extra Training Required
Employees continue using Word normally. Once the rules are set in the backend, adding watermarks to Word applies automatically. No extra tools, no new workflow, no training. Installation is simple and integrates with existing systems.
How to Add Watermarks in Word with AnySecura
When configuring watermarks in bulk, it is recommended to create a template first. This allows you to reuse it later and greatly improves configuration efficiency.
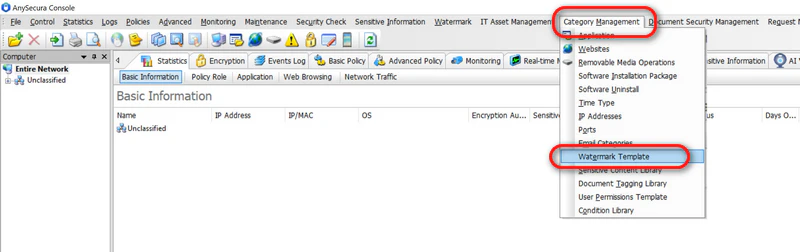
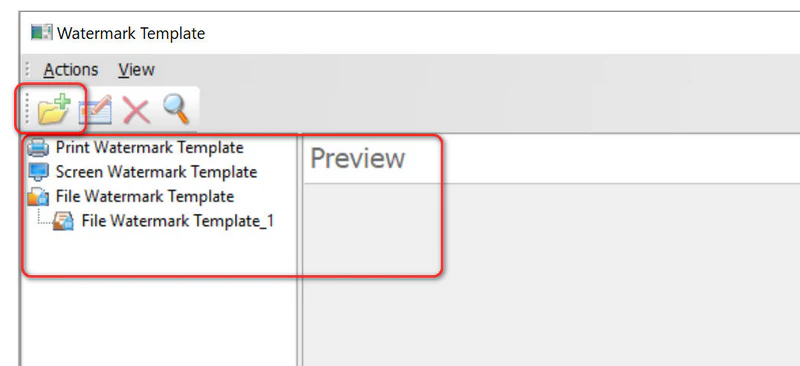
- Use an administrator account to access the AnySecura console. Click Category Management → Watermark Template.
- Choose the watermark type you want to create: Print Watermark Template, Screen Watermark Template, or File Watermark Template. In this example, select File Watermark Template. Then click Create, choose Create Blank Template, and confirm.
- Now, it's time to configure template properties. Enter the template name, then click Add to insert watermark objects (text / image / QR Code / dot matrix). Configure text content (can reference dynamic data such as user, IP, etc.), font, position, etc.
- Use the preview panel on the right to confirm the effect, then click OK to complete the template creation.
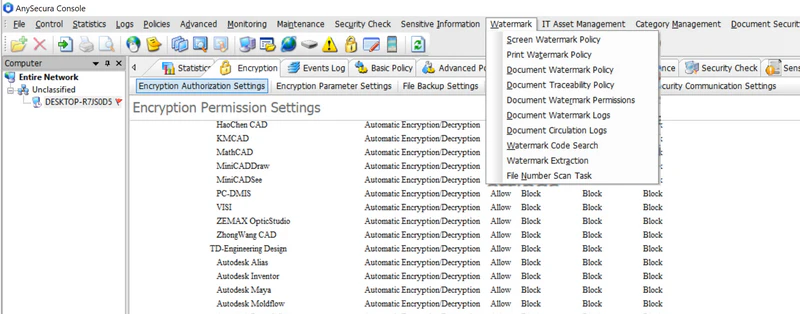
- After the watermark template is created, administrators can configure policies to automatically apply watermarks during document operations such as decryption and external sharing.
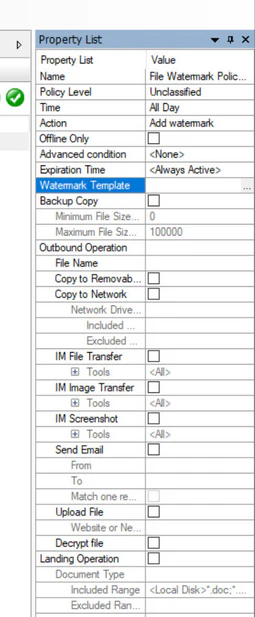
- Go to the Watermark policy settings. In the Computer section on the left, select the target endpoints, user groups, or departments to which the policy should apply. After making your selection, click Add to create a new watermark policy.
- Select the new policy, then in the properties panel on the right, click Watermark Template → ... to choose an existing template.
- Select the scenarios in which the watermark should be applied, such as: “Decrypt file”, “Upload File”. Also specify the applicable file types.
- Click Save. The policy will be synchronized to target endpoints within 1–3 minutes. After that, all related documents in target devices will be automatically watermarked.

Learn how to password protect a PDF with Adobe Acrobat, online tools, mobile apps, and AnySecura enterprise-grade encryption. Learn more>>
FAQs About Word Watermarks
I added a watermark in Word but it doesn’t show. What happened?
Make sure you’re in Print Layout view. Also, check if the word watermark is hidden behind images or text boxes. If it’s a custom watermark, lower its transparency.
How to remove watermark in Word?
For personal files: go to Design → Watermark → Remove Watermark. For AnySecura protected files: employees cannot remove it; administrators manage this uniformly.
Are watermark settings different in Word 2016/2019/365?
The feature is always under Design → Page Background → Watermark. Newer versions like 365 offer better preview and quick editing, but the steps remain similar.
Conclusion
Word watermarks are a simple but essential method for document security. For individuals, Word’s built-in tools are sufficient.
For enterprises, however, the need for bulk, unified, and secure insert watermark in Wordrequires a professional solution. AnySecura not only enables large-scale, standardized word watermarking but also provides anti-tampering, traceability, and full document security management, making it a reliable tool for protecting sensitive information.
For organizations, choosing AnySecura is not just about adding watermarks to Word, but about enabling standardized, efficient, and secure document management, and greatly reducing the risk of information leakage.
