How to Use Policy Sets and Roles in Console with AnySecura | User Guide
This guide will help you master the powerful policy and role management features within the AnySecura Console. You'll learn how to bundle security rules into reusable policy sets and assign them to logical groups of users or computers, streamlining your administrative workflow.
By understanding how to create roles for different departments and adjust policy priorities, you can efficiently enforce precise security postures across your entire organization with AnySecura.
3.4.1 Terminology
Policy Set
A policy set is a collection of multiple policies. Administrators can group frequently used policies into a set and then apply the set to various objects, such as computers, users, or roles.
Role
A role represents a group of objects that share the same policies. A single object can belong to multiple roles. Administrators typically define roles based on departments, such as Marketing or Sales, or by job level, such as Regular Staff or Department Manager. A computer or user can belong to multiple roles and inherit the policies associated with each role.
3.4.2 Basic Operations
Create New
Policy sets and roles must be created manually. In the Roles panel, select the Policy Set node, right-click and choose "Add New Policy Set" to create a new policy set and assign it a name. To rename a selected policy set, choose File → Rename from the menu. The same steps apply for creating and renaming roles.
View Basic Information
In the Roles panel, select Statistics → Basic Information to view the basic details of policy sets and roles.
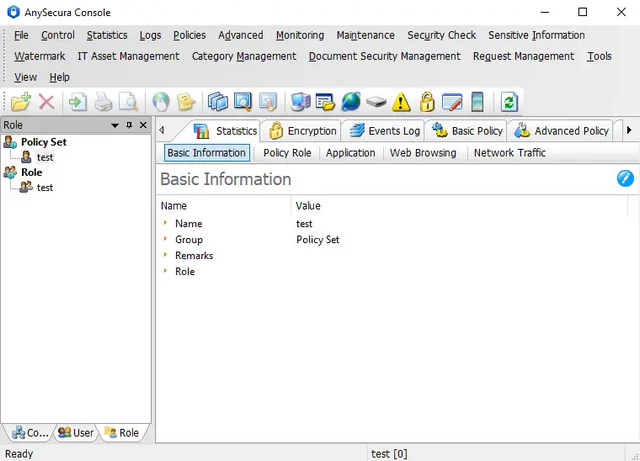
1) Policy Set Basic Information
Select a policy set in the Roles panel, and its basic information will be displayed in the data view area:
| Field Name | Description |
|---|---|
| Name | The name of the policy set. |
| Group | The policy set group to which this policy set belongs. |
| Remarks | Additional information or remarks about the policy set. |
| Roles | Assigned roles |
2) Policy Set Group Information
Select a policy set group in the Roles panel, and the display area will show all policy sets and sub-groups within that group.
3) Role Basic Information
Select a role in the Roles panel to view its basic details in the display area:
| Field Name | Description |
|---|---|
| Name | The name of the role. |
| Group | The role group to which this role belongs. |
| Remarks | Notes or comments about the role. |
| Policy Set | The policy sets included in this role. |
4) Role Group Information
Select a role group in the Roles panel, and the display area will show all roles and subgroups contained within that role group.
Group Operations
1) Create a New Group
In the Roles panel, select a Policy Set node and choose File → New Group. A new editable group node will appear in the policy set tree. Enter a group name and drag the related policy sets into this group. Administrators can use the same method to create multi-level group structures.
Similarly, when selecting a Role node, you can manage roles by grouping them in the same way.
2) Assign or Change Groups
To assign policy sets or roles to specific groups or change their group, select the desired policy sets or roles, choose File → Move To, and select the target group. The selected items will move to the designated group.
You can also use drag-and-drop: select the items, hold the left mouse button, and drag them to the target group. The selected policy sets (or roles) will then belong to that group.
Note:
- To simplify grouping, multiple policy sets or roles can be moved simultaneously. For example, select a group, go to Statistics → Basic Information, hold CTRL or SHIFT, and select multiple items to move them to the designated group.
Adjusting Policy Set Priority
Within a single policy set, policies of the same type are matched in sequence, and the first matching policy takes effect. For multiple policy sets, the priority follows the structure of the policy set tree: from top to bottom, higher positions indicate higher priority. In other words, a policy set located higher in the tree has its policies executed before those lower down.
Go to Statistics → Basic Information and select the policy set group node. In the right-hand view, you will see all policy sets and groups at the current level. Use the Move Up ![]() and Move Down
and Move Down ![]() buttons to reorder them, thereby adjusting their priority.
buttons to reorder them, thereby adjusting their priority.
Note:
- After adjusting the order, click the Save
 button to apply the changes.
Copying Policy Sets
In the policy set tree under the Roles panel, right-click a policy set and select Copy Policy Set to duplicate it. The copied policy set inherits the original's general attributes and contained policies but does not inherit assigned roles or objects.
Searching
The search function allows administrators to quickly locate specific policy sets or roles and view their related information.
In the Roles panel, go to File → Search to open the search dialog. Enter the search criteria, which support the name (as shown in the policy set tree) and fuzzy matching. The results include both policy sets and roles.
Deleting
Policy sets that are no longer needed can be deleted from the console. Select File → Delete to remove the selected policy set(s) or group(s) from the tree or list. Deleting a policy set will remove its effects from any assigned roles or objects.
The same method applies to roles; deleting a role also removes its relationships with assigned objects.
Importing and Exporting
In the policy set tree, right-click the Policy Sets node and select Export to open the Select Objects window. You can choose which policy sets to export, including multiple selections. Right-click Import to bring previously exported policy sets back into the Policy Sets node.
In the roles tree, right-click the Roles node to import or export roles using the same method.
Note:
- When importing policy sets or roles, any existing items with the same name will not be imported.
3.4.3 Setting Policy Sets
In the Roles panel, select a policy set and go to Statistics → Policy Roles. The right-hand display shows all objects assigned to this policy set, including computers and users. Objects that have policies applied via the policy set are marked with a small blue flag icon "![]() ".
".
| Field Name | Description |
|---|---|
| Name | The name of the assigned computer or user. |
| Group | The group to which the computer or user belongs. |
Click the Edit ![]() button to modify the policy set properties.
button to modify the policy set properties.
Click the Export ![]() button to export all computer and user objects assigned to the policy set.
button to export all computer and user objects assigned to the policy set.
Policy Set
Displays the name of the policy set and its group. You can also add remarks for the policy set here.
Computers & Users
The list shows the computers and users assigned to this policy set. Click the Add button  to assign the policy set to the selected computers or users. Once assigned, these computers and users will inherit the policies within the policy set. Click the Export button
  to export all computer and user objects under this policy set.
Roles
The list shows the roles assigned to this policy set. Click the Add button to assign the policy set to the selected roles. Once assigned, these roles will inherit all policies within the policy set.
3.4.4 Setting Roles
Select a role in the Roles panel, then choose Menu → Statistics → Policy Role. The right-hand view will display all objects assigned to this role, including computers and users.
| Field Name | Description |
|---|---|
| Name | The name of the assigned computer or user. |
| Group | The group to which the computer or user belongs. |
| Assignment Time | The time when the object was assigned to this role. |
| Last Login | For computer objects: shows the last user who logged in. For user objects: shows the last computer the user logged into. Computer groups and user groups are empty. |
| IP Address | For computer objects: displays its own network address. For user objects: displays the network address of the computer they logged into. Computer groups and user groups are empty. |
Click the Edit button ![]() to modify the role's properties.
to modify the role's properties.
Click the Export button ![]() to export all computer and user objects under the entire role tree.
to export all computer and user objects under the entire role tree.
General
Displays the role's name and its group, with an option to add remarks for the role.
Computers & Users
Shows the computers and users assigned to this role. Click the Add button to assign the role to selected computers and users. Once assigned, these computers and users inherit the policies included in the role's policy sets. Click the Export button to export all computer and user objects under the entire role tree.
Policy Sets
Shows the policy sets assigned to this role. Click the Add button to assign policy sets to the selected role. Once assigned, the role carries all policies included in these policy sets.
Note:
- Policies assigned to computers (or groups) and users (or groups) via policy sets or roles are collectively referred to as computer/group role policies and user/group role policies.
Example of Using Policy & Role Function
For internal management, a company may need to differentiate asset usage permissions for employees in different departments. Some assets may be accessible to all departments, while others are restricted to specific departments. For example, to prevent R&D staff from using USB drives and printers, and allow sales staff to use printers but not USB drives, follow these steps:
1. Create two policy sets: "Block USB Usage" and "Block Printer Usage".
2. Configure the policies for each set: For "Block USB Usage", set a policy to block all or specific USB drives. For "Block Printer Usage", set a policy to block all or specific printers.
3. Create roles based on departments, such as "R&D Staff" and "Sales Staff".
4. Assign the policy sets to the corresponding roles: Assign "Block USB Usage" to both R&D Staff and Sales Staff. Assign "Block Printer Usage" to R&D Staff only.
5. Assign the roles to the appropriate computers or users, applying the policies accordingly.