How to Use Document ID Scanning Tasks in Watermark - AnySecura Manual
This guide will help you master the Document ID Scanning Tasks within the AnySecura Watermark module. You'll learn how to efficiently discover and catalog files across your network, establishing a clear foundation for document tracking.
We'll then walk through configuring a scanning task, from setting target paths to fine-tuning performance, ensuring you can deploy this powerful AnySecura feature with confidence.
Administrators can configure document ID scanning tasks on multiple clients simultaneously. This enables scanning of local or network paths on the target clients, with the option to assign document IDs to the scanned files.
Administrators with the permission Permissions → Watermark → Configure Document Number Scan Task can access the Watermark → Document Number Scanning Task menu to open the configuration dialog and set up scanning tasks.
Administrators with the permission Permissions → Watermark → View Document Number Scan Tasks and Logs and Logs can view task details and related logs.
12.5.1 Configure Task
Steps to configure a Document ID scanning task:
- Click the Add icon
 in the upper-right corner to open the Create Scanning Task dialog.
 - In the General tab, configure the general settings.
- Switch to the Advanced tab to configure advanced settings.
- When all settings are complete, click OK to create the scanning task.
General Settings
| Setting | Description |
|---|---|
| Task Name | The name of the current task. Default format: Document ID Scanning Task + Date. |
| Target Object | Select the target computers on which the task will run. |
| Scan Path | Specify the directories to scan. By default, all hard drives are included. Supports local paths, network paths, and mapped drives. Multiple paths can be separated by commas or semicolons. |
| Include Files | Files within this scope will be scanned. You may choose from predefined file types or manually enter patterns using the |
| Search Files in Archives | When checked, documents inside compressed files will also be identified. |
| Exclude Files | Files within this scope will not be scanned. You may choose from predefined file types or manually enter patterns using the |
Note
- Exclusion rules take precedence over inclusion rules.
Advanced Settings
| Setting | Description |
|---|---|
| Task Options | Configure what the task will perform. |
| Scan Files with Document Number | Scan only files on the client that already have a document ID, and record them in Watermark → Document Circulation Log. |
| Add Document Nmuber | Scan client files, assign document IDs to files without one, and record them in Watermark → Document Circulation Log. |
| Scan Settings | Configure the scanning parameters. |
| Scan Schedule | Set the time for the task to begin. Select a category from the dropdown menu; the available options correspond to the classifications in Time Type Management. |
| Scan Cycle | Configure how frequently the task will run. Options:
|
| Performance Settings | Control task performance during scanning. |
| Prioritize Scanning Speed | Faster scanning speed but with higher impact on system performance. Recommended for non-working hours. |
| Prioritize System Performance | Slower scanning speed with lower resource usage. Recommended during working hours. |
| Scan Only When Idle | Files are scanned only when the client is idle. A client is considered idle when the console shows its status as Running (Idle). |
| File Size | Only files within this size range will be scanned. |
Notes
- 1. If no target computer is selected or the Include Files field is left empty, the scan task cannot be created.
- 2. Once a Document ID scanning task is created, its settings cannot be modified. Please confirm all configurations carefully before creation.
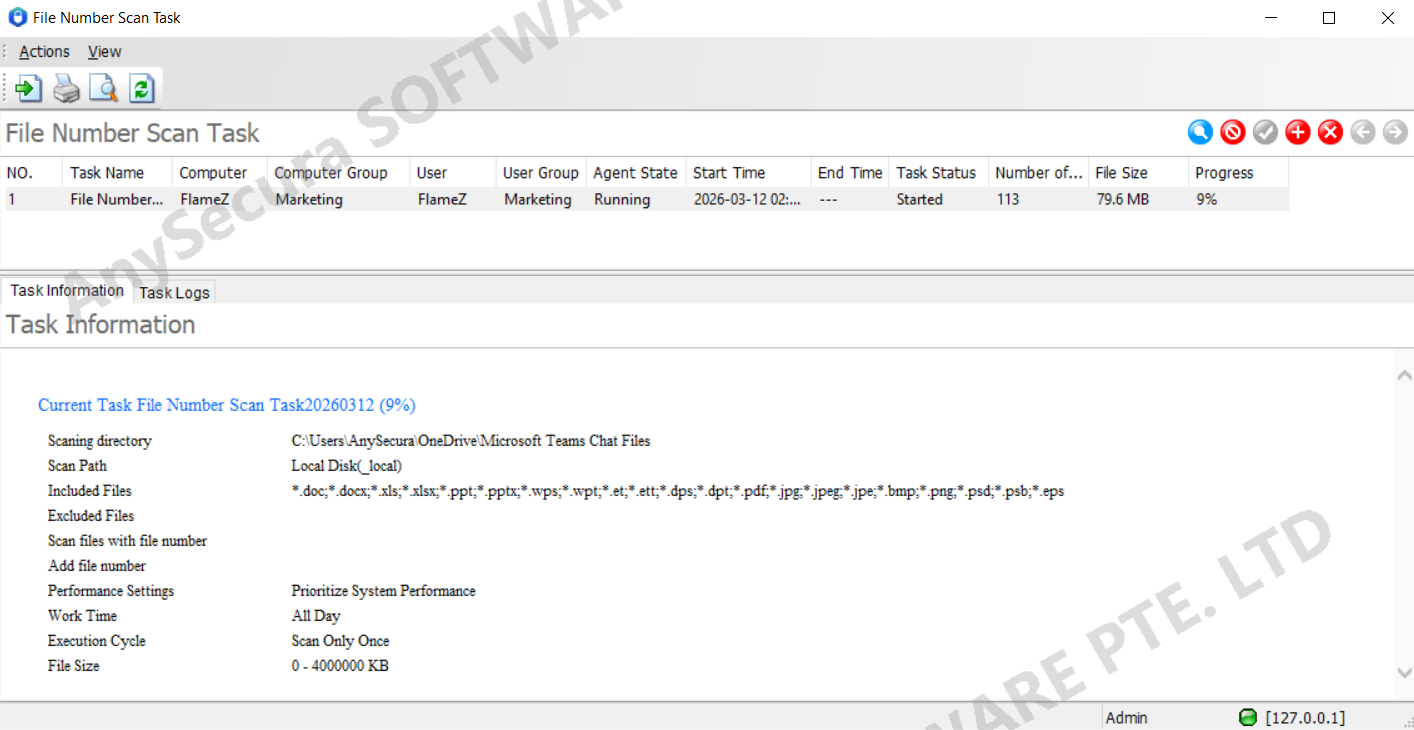
12.5.2 Viewing Task Information
Current Task Information
In the upper section of the Document ID Scanning Task interface, you can view the basic details of the current task.
| Field | Description |
|---|---|
| Task Name | The name of the scanning task. |
| Computer | The name of the client computer. |
| Computer Group | The group to which the client computer belongs. |
| User | The user logged in on the client. |
| User Group | The user group to which the client belongs. |
| Computer Status | The current running status of the client. |
| Start Time | The time when the task started. |
| End Time | The time when the task ended. |
| Task Status | The current status of the task.
|
| Number of Files | The number of files scanned and assigned a document ID. |
| File Size | The total size of files scanned and assigned a document ID. |
| Progress | The completion progress of the task, updated automatically. |
Additional Task Information
When you select a client, the lower section of the Document Number Scanning Task interface (in the Task Information tab) displays task details for that client. These details include the settings applied when the task was created, such as:
- Scan paths
- Included files
- Excluded files
- Performance settings
- Execution schedule
- Execution cycle
- File size range
Note
- A Document ID scanning task is executed only once. Once completed, it cannot be rerun.
12.5.3 Viewing Task Logs
In the Document Number Scanning Task interface, select a client. In the lower section, under the Task Logs tab, you can view the logs of tasks executed by that client. Use the Refresh button on the toolbar to update the log view.
| Field | Description |
|---|---|
| Time | The timestamp when the log entry was generated. |
| Task Name | The name of the task being executed. |
| Content | Includes:
|
12.5.4 Enable / Disable Scanning
Disable
By default, the scanning function on a computer is enabled. In the Document Number Scanning Task interface, select one or more tasks and click the Disable icon ![]() ,or right-click and choose Disable Scanning Task. The selected tasks will be paused.
,or right-click and choose Disable Scanning Task. The selected tasks will be paused.
Enable
Select one or more paused tasks and click the Enable icon ![]() ,or right-click and choose Enable Scanning Task. The selected tasks will resume execution.
,or right-click and choose Enable Scanning Task. The selected tasks will resume execution.
12.5.5 Delete Task
Select one or more tasks, then click the Delete icon ![]() or right-click and choose Delete Scanning Task. The selected tasks will be removed.
or right-click and choose Delete Scanning Task. The selected tasks will be removed.
12.5.6 Query Computer Tasks
Click the Query icon ![]() to open the Select Query Object dialog. Choose a specific computer or computer group, then click OK. The computer list will display only those that match the query criteria, allowing for targeted viewing.
to open the Select Query Object dialog. Choose a specific computer or computer group, then click OK. The computer list will display only those that match the query criteria, allowing for targeted viewing.