How to Use Document Backup Server in Document Security Management - AnySecura Manual
This guide will help you set up the AnySecura Document Backup Server, a central safety net for your encrypted files. You'll learn how to install and configure this server to securely store plaintext backups from all your Windows, Mac, and Linux clients, ensuring critical documents can always be recovered.
Once your backup server is running, you'll see how to authorize it from the console and define which computers it protects. We'll then walk through setting precise backup conditions, giving you full control over what gets backed up and when, so your data resilience is both robust and efficient.
Users can deploy an encrypted document backup server to centrally back up encrypted files from all clients in plaintext. This ensures that even if encrypted files on a client are lost or damaged, they can be recovered from the server.
Note: The backup server supports file backups from Windows, Mac, and Linux clients.
21.19.1 Document Backup Server
Installation
The encrypted document backup server can be installed on the same machine as the main server or on a separate machine. Run the installer by double-clicking it. Steps:
- 1. Double-click AnySecuraBackup.exe, select the installation language, and click OK.
- 2. The welcome screen will appear; click Next to continue.
- 3. The installer will prompt you to confirm the installation path; you can also choose a different path.
- 4. Select the Start Menu folder for shortcuts and click Next.
- 5. Confirm the settings and click Install. After files are copied, the installation is complete. Click Finish to complete the setup.
View Backup Server Status
The encrypted document backup server icon displays its current operational status. The specific statuses are:
| Icon Status | Description |
|---|---|
 |
Document backup server is starting. |
 |
Document backup service is stopped. |
 |
Run parameters not set (including connection, backup, or storage settings), or authorization with the server has not been verified. |
 |
Successfully connected to the server and authorized. |
 |
Successfully connected to the server but not authorized. |
 |
Disconnected from the server, or storage space has reached the warning limit. |
 |
Disconnected from the server and not authorized. |
 |
Backup stopped, or communication error occurred. |
Right-click the encrypted document backup server icon and select Status from the menu to view more detailed server status information.
Server Parameter Settings
Right-click the encrypted document backup server icon, go to Tools -> Options, and the Server Parameter Settings dialog will appear for
| Parameter | Description |
|---|---|
| Connection Parameters: | |
| Server Address | Specify the server address to connect to. |
| Local Domain Name or IP | If the backup server and clients are on the same network, leave blank. If they are on different networks, enter the public IP of the backup server’s LAN. The LAN must also have port 8249 mapped for backups to work. |
| Backup Library Path | Specify the storage path for encrypted document backups. |
| History Copies | If checked, specify the maximum number of copies to retain. Only the latest specified number of backup copies will be kept. |
| Free Storage Space Management: | |
| Auto Cleanup | If checked, and both remaining space size and history copy count are set, then when space falls below the limit, only the latest specified number of copies will be kept. |
| Auto Delete Old Backups | If checked and a number of days is set, backups and copies older than that will be deleted. |
| Send Alert | An alert will be triggered if available space on the backup path drive is below the set value. |
| Stop Backup | Backup will stop if available space on the backup path drive is below the set value. |
Note:
- When both alert and stop-backup limits are set, the alert value must be greater than the stop-backup value.
View Runtime Logs
Right-click the encrypted document backup server icon and select Tools -> Runtime Logs to view logs related to the server’s operating status.
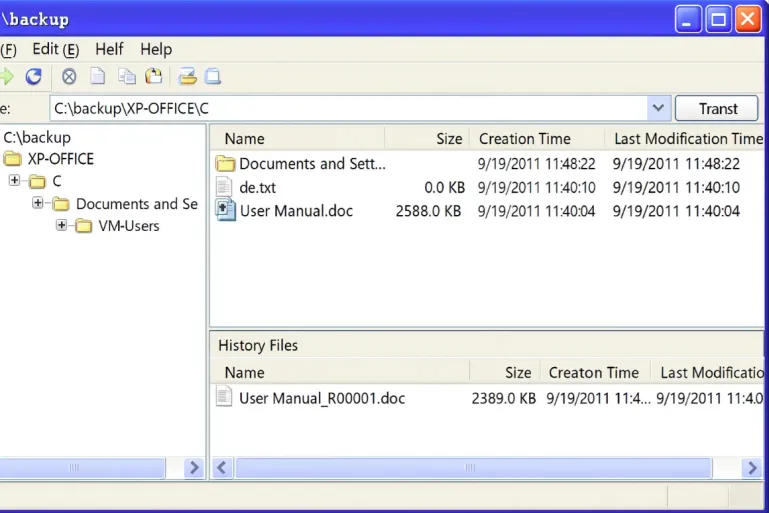
Backup Document Management Tool
Right-click the encrypted document backup server icon and select Tools -> Backup Document Management Tool to view backup documents from each client machine.
21.19.2 Document Backup Management
Authorization
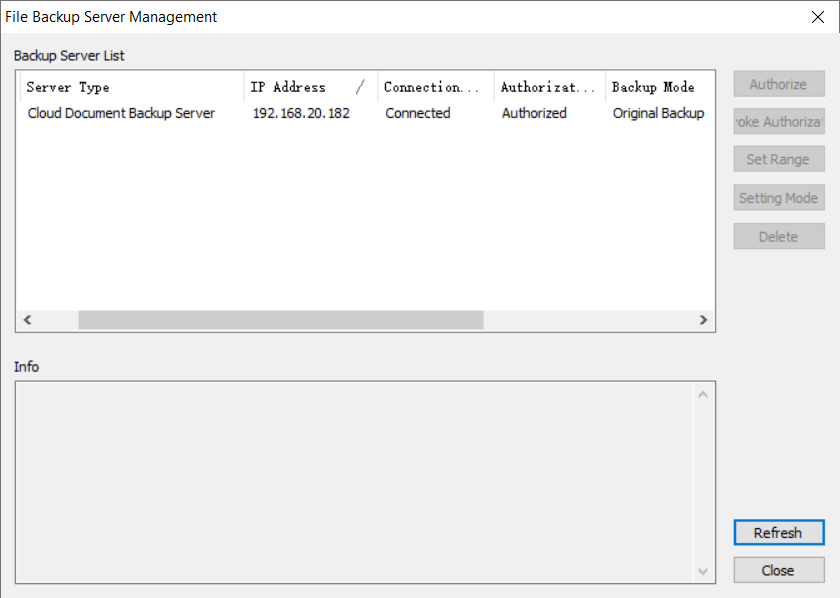
After configuring the connection parameters of the encrypted document backup server, authorization must be granted from the console connected to the corresponding server.
Go to Tools -> Server Management -> Document Backup Server Management. In the list, select the target backup server and click Authorize. Once successful, the backup server status will change to Authorized.
Click Revoke Authorization to return the backup server status to Unauthorized.
Set Scope
The default scope of machines for document backup is none. Click Set Scope to open the selection window, check the computers or computer groups to include for backup, and click OK to complete the configuration.
Set Mode
The default backup mode is Plaintext Mode. The modes are described as follows:
| Mode | Description |
|---|---|
| Plaintext Mode | Documents triggered for backup are saved on the backup server in plaintext. |
| Ciphertext Mode | Documents triggered for backup are saved on the backup server in encrypted form. |
| Original Mode | Documents triggered for backup retain their original state: plaintext files are saved as plaintext, encrypted files are saved as encrypted. |
After selecting a mode, click OK to complete the setup.
Set Backup Conditions
By default, automatic encrypted document backup tasks are not enabled on client machines.
Log in to the console and go to Document Security Management -> Other Permission Settings -> Document Backup Settings. Here, you can enable or disable automatic encrypted document backup tasks on client machines and configure the backup conditions.
| Icon/Button | Description |
|---|---|
 |
Change the document backup conditions for the selected computer. |
 |
Remove the document backup conditions for the selected computer. |
When modifying backup conditions, if Enable Automatic Encrypted Document Backup Task is checked, any changes to encrypted documents or encryption of unencrypted documents will trigger backups according to the following backup restriction conditions for that computer:
| Option | Description |
|---|---|
| Include Files | Files within this range will be backed up. Enter file names or paths; wildcards are supported (e.g., *.doc, C:*). |
| Exclude Files | Files within this range will not be backed up. Enter file names or paths; wildcards are supported (e.g., *.doc, C:*). Exclusions take priority over inclusions. |
| Backup Size Range | Files with encryption operations within this size range will be backed up. |
| Backup Interval | If a file is modified multiple times within this time range, it will be backed up only once. |
| Backup Traffic | The upload bandwidth for backup files will not exceed this value. |
| Backup Time Period | Files will be uploaded to the backup server only during this time period (e.g., 14:00–18:00). |
| Periodic Scan Backup | Whether to regularly scan and back up encrypted files. |
| Scan Date | Specify the date(s) for periodic scanning. |
| Scan Time | Specify the start and end time for periodic scanning. If scanning is not completed by the end time, the next scan will resume from where it left off. If no end time is specified, scanning continues until all files are processed. |
| Allow Client to Enable or Disable Backup | If checked, the client can choose whether to back up files. Default is unchecked. |
Note:
- Documents detected for backup during the scan period will only be backed up to the server once the designated backup time period begins.
View Document Backup Logs
In the console, go to Document Security Management -> Document Backup Operation Logs to view the backup operation logs.