How to Use Login Authentication in User System Management - AnySecura Manual
This guide will help you configure the powerful Login Authentication feature within AnySecura's User System Management module. You'll learn how to set policies that ensure only authorized users can access protected systems.
We'll walk through creating both forced and non-forced authentication rules, allowing you to tailor security for different client groups. You'll understand how these settings work from the client's perspective and how to manage user sessions effectively.
19.2.1 Console Settings Policy
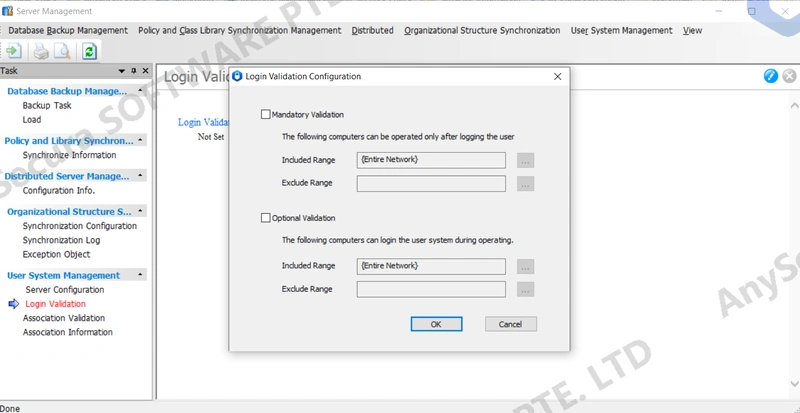
Select Tools -> Server Management -> User System Management -> Login Authentication to access the login authentication interface, where you can configure whether to enable login authentication.
Click the icon ![]() to open the login authentication configuration interface and set the corresponding parameters:
to open the login authentication configuration interface and set the corresponding parameters:
| Parameter | Description |
|---|---|
| Enforce Authentication | Check this option to enable forced login authentication. |
| Included Range | Set the client range that will perform forced authentication. |
| Excluded Range | Set the client range that will not perform forced authentication. |
| Non-Forced Authentication | Check this option to enable non-forced login authentication. |
| Included Range | Set the client range that will perform non-forced authentication. |
| Excluded Range | Set the client range that will not perform non-forced authentication. |
Note:
- If both forced login authentication and non-forced login authentication are set for a client, the forced login authentication will take precedence over the non-forced login authentication.
19.2.2 Client Login Authentication
Login Authentication
Forced Authentication
For clients with forced authentication enabled:
- If the Windows system login account does not exist on the domain server specified in "Server Configuration", a user system login dialog will pop up after logging into Windows. The dialog cannot be closed unless the username and correct password of an existing domain server user are entered. Only then can the computer be used normally.
- If the Windows system login account exists on the domain server specified in "Server Configuration", the user system login dialog will not pop up after logging into Windows. The current logged-in user will automatically log into the user system, and the computer can be used normally.
Non-Forced Authentication
For clients with non-forced authentication enabled:
- Regardless of whether the Windows system login account exists on the domain server specified in "Server Configuration", the user system login dialog will not pop up after logging into Windows. The current logged-in user will automatically log into the user system, and the computer can be used normally.If the login dialog is manually triggered, it can be closed directly.
Note:
- In the client tray menu, select "Login User" or "Logout" to manually log in or log out of the user system.
Request to Cancel Forced Login
Under the forced login authentication policy, if the client forgets their domain account or is offline, they can request to cancel forced login authentication temporarily until the computer is restarted.
After the first failed login attempt, the client will see a "Request to Cancel Forced Login" button on the interface. Clicking this button will open the "Verify Operation Code" window.
In the console, go to Tools -> Client Tools -> Confirmation Code Generator. Copy the original operation code from the client's "Verification Operation Code" field into the Client Operation Code field of the Confirmation Code Generator, then click "Parse" and click "Generate Confirmation Code". Enter the confirmation code generated by the console into the "Verification Operation Code" field on the client to cancel the forced login authentication.
Switch User
For clients with forced login authentication or non-forced login authentication enabled, if a domain account is used to log into the operating system, the user system will automatically log in using this domain account. Right-clicking the client tray will display a "Switch User" option. Clicking this will open the user system login window, where you can enter another user's login credentials to switch to a different user.
After successfully switching to another user, right-clicking the client tray will change the "Switch User" option to "Logout". Selecting "Logout" will automatically log the user back into the original domain account used to log into the operating system.