How to Use Associated Authentication in User System Management - AnySecura Manual
This guide will help you configure the powerful Associated Authentication feature within AnySecura's User System Management module. You'll learn how to set policies that link user logins to specific machines, enhancing your security posture by controlling access.
We'll walk through the console settings where you define these rules, from enforcing mandatory authentication for certain clients to creating more flexible, non-forced associations. Understanding these options will give you precise control over how user identities are managed and verified across your network.
19.3.1 Console Settings Policy
Select User System Management -> Associated Authentication to enter the associated authentication settings interface, where you can choose whether to enable associated authentication and configure the corresponding parameters.
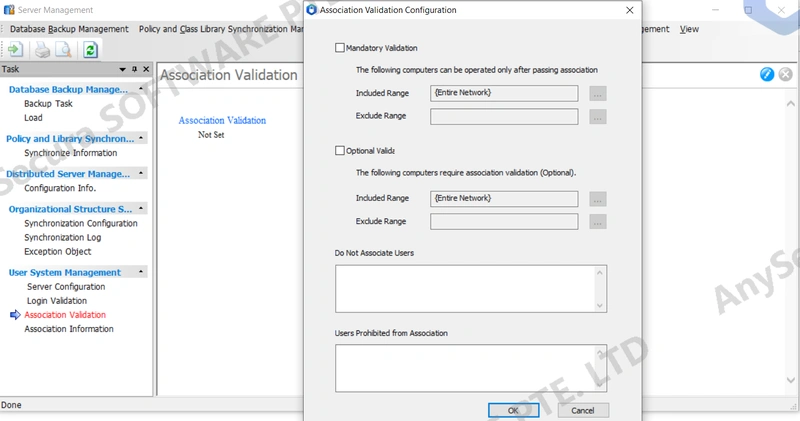
Click the icon ![]() to open the associated authentication configuration interface and set the parameters as needed.
to open the associated authentication configuration interface and set the parameters as needed.
| Parameter | Description |
|---|---|
| Enforce Authentication | Check this option to enable forced user association authentication. |
| Included Range | Set the client range that will perform forced authentication. |
| Excluded Range | Set the client range that will not perform forced authentication. |
| Non-Forced Authentication | Check this option to enable non-forced user association. |
| Included Range | Set the client range that will perform non-forced authentication. |
| Excluded Range | Set the client range that will not perform non-forced authentication. |
| Do Not Associate User | After successful login with the user account from this setting, the user can log in and use the computer normally, but the username will not be associated with the local machine. Supports input in username and domain\username format. |
| Prohibit User Association | After logging in or authenticating with the user account from this setting, the authentication will fail, and the computer will remain locked. Supports input in username and domain\username format. |
19.3.2 Client Associated Authentication
Forced Associated Authentication
For clients with forced associated authentication enabled:
- If the machine already has an associated user and the associated user exists on the domain server specified in "Server Configuration", the "User Association Authentication" window will not pop up, and the computer can be used normally.
- If the machine does not have an associated user, or the associated user is not the one specified in "Server Configuration" on the domain server, the "User Association Authentication" window will pop up. The window cannot be closed, and the user must enter the username and correct password of an existing domain server user. Only after successful verification can the computer be used normally. The newly entered user will automatically become the local machine's associated user.
Non-Forced Association
For clients with non-forced associated authentication enabled:
- If the machine already has an associated user and the associated user exists on the domain server specified in "Server Configuration", the "User Association Authentication" window will not pop up, and the computer can be used normally.
- If the machine does not have an associated user, or the associated user is not the one specified in "Server Configuration" on the domain server, the "User Association Authentication" window will pop up. You can either enter the username and correct password of an existing domain server user (which will automatically set this user as the local machine's associated user), or directly close the dialog, and the computer can still be used normally. If a new user is entered, that user will be set as the local machine's associated user.